Welcome, Guest. Please login or register.
January 15, 2025, 03:50:08 AM

Login with username, password and session length

Recent Topics

[January 14, 2025, 08:15:02 PM]

[January 11, 2025, 02:03:48 PM]

[January 10, 2025, 08:41:37 AM]

by Spot
[January 09, 2025, 02:47:37 PM]

[January 02, 2025, 05:38:45 PM]

[January 02, 2025, 10:16:56 AM]

[December 24, 2024, 06:15:59 PM]

[December 15, 2024, 06:25:42 PM]

[December 09, 2024, 11:54:27 AM]

[December 06, 2024, 04:28:35 PM]

[December 03, 2024, 07:14:34 AM]

[November 29, 2024, 08:35:06 PM]

[November 28, 2024, 08:59:55 AM]

[November 25, 2024, 11:16:05 AM]

[November 25, 2024, 07:55:58 AM]

Picture Of The Month


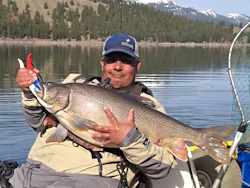
Pepper and rogerdodger with a nice fall coho

Topic: Flush flag mount.  (Read 8855 times)

0 Members and 1 Guest are viewing this topic.

INSAYN

  • ORC_Safety
  • Sturgeon
  • *
  • **RIP...Ron, Ro, AMB, Stephen**
  • Location: Forest Grove, OR
  • Date Registered: Aug 2008
  • Posts: 5417
I was going to do this on my T-13 a few years ago, but built a roll bar (multi rod holder)  and had a flag mount on top of that instead. 

Decided at this point I don't need a roll bar on m Revo, and put together my flush mount.


Now I've had this one on the center rear for a while now, and it works great.  However, I can't reach it from my seat to remove before surf reentry.
Where it sits back there, I'm afraid that the mount could cause excess flex on the plastic in the event of a huli, and crack the kayak before breaking the flag rod first.

So, today I went about making another one off to the left side of the tank well on a thicker multi-contoured ledge.


Here's the breakdown on how it's put together.

Not sure what these parts are for, but found the dark gray Sched 80 tube with the female threaded flange in the plumbing department of ACE hardware, as did the Sched 40 white cap.


This guy here is from the electrical department, and is a 1/2" Terminal Adapter.
I cut off the tubular area and sanded smooth.  This is part will be visible from the exterior of the kayak.


This is the basic layout of the parts after the PVC is cut to shape.  The clear tube shoved into the lower section is just to take up some
space in the tube to hold my flag rod from swimming around in the holder.  Some flag rods are big enough to not need this spacer.


I just pushed the clear tube in as far as I could, and trimmed it off flush.


Glue on the cap.


The black tube is yet another space to keep the rod in line.
The rubber washer is used to seal everything from the underside. 
Find a thin one or use, Goop, as your kayak may be thicker than mine and the two parts that screw together may not have enough threads catch and hold well.


Here is what the rod looks like in the holder while it's out of the kayak.


As seen from above, nice and flush.


And from underneath.


As for the leash, I just tied a loop of 550 cord on a piece of fuel tube larger than ID than the flag rod OD.
Then warm up, stretch and slide up a smaller diameter piece of fuel tube to hold the prior in place.
Then a few wraps of electrical tape and some heat shrink.   Probably overkill, but it holds and isn't an eye sore.


"If I was ever stranded on a beach with only hand lotion...You're the guy I'd want with me!"   Polyangler, 2/27/15


Ling Banger

  • Sturgeon
  • *******
  • Location: Lincoln Beach, OR
  • Date Registered: Feb 2010
  • Posts: 2589
Pretty slick, good detailed tutorial. You're one crafty SOB!
"We're going to go fishing
And that's all there is to it." - R.P. McMurphy


demonick

  • Sturgeon
  • *******
  • Domenick Venezia, Author
  • Date Registered: Apr 2009
  • Posts: 2835
Nice work and nice DIY cart.  I have a Wheelez that came with the same wheel retention pins and had one fall off and lost on a beach launch.  Some debris bumped the ring, flipped it up, and the pin worked its way out.  I replaced the pins with these 2-1/2" stainless spring clips from Ace Hardware.  Carrying spare pins is a good idea. 
« Last Edit: May 23, 2011, 10:35:16 AM by demonick »
demonick
Author, Linc Malloy Legacies -- Action/Adventure/Thrillers
2021 Chanticleer Finalist - Global Thriller Series & High Stakes Fiction
Rip City Legacy, Book 6 latest release!
DomenickVenezia.com


INSAYN

  • ORC_Safety
  • Sturgeon
  • *
  • **RIP...Ron, Ro, AMB, Stephen**
  • Location: Forest Grove, OR
  • Date Registered: Aug 2008
  • Posts: 5417
Yeah, I have the same Wheeleze cart for my T13 as you have, and those round clips are definitely junk. 
The ones you see in my pics now are really strong and can smash a finger if not paying attention. 
 

"If I was ever stranded on a beach with only hand lotion...You're the guy I'd want with me!"   Polyangler, 2/27/15


demonick

  • Sturgeon
  • *******
  • Domenick Venezia, Author
  • Date Registered: Apr 2009
  • Posts: 2835
What is ironic is that the spring clips are probably much cheaper than the pins/circle retainers. 
demonick
Author, Linc Malloy Legacies -- Action/Adventure/Thrillers
2021 Chanticleer Finalist - Global Thriller Series & High Stakes Fiction
Rip City Legacy, Book 6 latest release!
DomenickVenezia.com


ZeeHawk

  • Administrator
  • Sturgeon
  • *****
  • Sauber is my co-pilot.
  • Location: Seattle, WA
  • Date Registered: Sep 2006
  • Posts: 5506
That's really ingenious work Craig. Nice!
2010 Angler Of The Year
2008 Moutcha Bay Pro - Winner
Jackson kayaks, Kokatat, Daiwa, Werner Paddles, Orion, RinseKit, Kayak Academy


INSAYN

  • ORC_Safety
  • Sturgeon
  • *
  • **RIP...Ron, Ro, AMB, Stephen**
  • Location: Forest Grove, OR
  • Date Registered: Aug 2008
  • Posts: 5417
What is ironic is that the spring clips are probably much cheaper than the pins/circle retainers.

The spring clips can be a bugger to remove with cold wet hands.  The circle pins are a breeze and hold solid. 
Only $0.49 each at my local ACE.
 

"If I was ever stranded on a beach with only hand lotion...You're the guy I'd want with me!"   Polyangler, 2/27/15


bluewrx02

  • Salmon
  • ******
  • Facebook
  • Location: Hillsboring Oregon
  • Date Registered: Jan 2011
  • Posts: 802
That's really ingenious work Craig. Nice!

I keep telling him that at work. He could be so rich if he innovates things for a living. 
2011 Oregon Rockfish Classic – 1st place
2013 Oregon Rockfish Classic - 1st place

2011 Hobie Outback     
2013 Hobie Revo 13     
2014 Hobie Adventure Island


DTS

  • Lingcod
  • *****
  • Location: Oregon
  • Date Registered: Sep 2009
  • Posts: 372
Nice work INSAYN!  8)

I agree with bluewrx02.  You should make some dough.   ;D
PROGRESS IS JUST BEING THERE!


INSAYN

  • ORC_Safety
  • Sturgeon
  • *
  • **RIP...Ron, Ro, AMB, Stephen**
  • Location: Forest Grove, OR
  • Date Registered: Aug 2008
  • Posts: 5417
I hear ya, I hear ya.   My reason for not jumping on the "business" side of creating things, is that I don't stick to just one item, for any particular hobby.  I usually build something to fit "MY" needs due to a product that isn't available, too expensive, out there but impossible to get, or just something I thought up that could help someone else out.   To go into business with the sense of making money, I would have to focus on one item too long to make it marketable, accessable, and sustainable.  Believe me, I have a long list of ideas in my head that still need to make it to prototype before I die.   

I like to create from scratch, solve complex fabrication road blocks, share and give the DIY'rs out there either something to work with, or spawn more ideas from.  For example, my tube bender that I designed and built on my garage floor back in 2002 to build roll cages with.  It has spawned a huge wave of DIY tube benders across the globe, was printed in Chopper Underground Magazine in a 4 page full color spread, and been linked to from every corner of the internet.  Now there are some really cool tube benders out there now that garage monkeys like myself have come up with.  Mine was the first to show up on the interenet back in 2002, spawned many great and better functioning benders, and is still pinged heavily. 

Go ahead and Google Images for Tube Bender Plans, DIY Tube Bender, or Homemade Tube Bender and you will see the one below many times over.  All others you see were spawned from that one way or another.

http://www.blindchickenracing.com/Tools/Tube%20Bender/Tubingbender.htm


Like many folks here have already done, when you hit a road block in something you are trying to fabricate, install, pimp or tweak, shoot me a PM and let me have a crack at it.  I love the challenge!
 

"If I was ever stranded on a beach with only hand lotion...You're the guy I'd want with me!"   Polyangler, 2/27/15